Battle Report - The Hordes Advance
Last week ended with my birthday, a flurry of hobby purchases, and then a weekend spent building Tyranids. This week so far has consisted of work and self-pity from being extremely sick, so needless to say the blog has been seriously neglected. Today I sweep the fresh dust off and return with another battle report, this time between Tyranids and Orks!
The battle had raged back and forth for several days now. The sky was choked with Tyranid spores and the pollution of a thousand Ork vehicles. The human settlement was a complete wreck now, and the signs of both xenos life forms were everywhere.
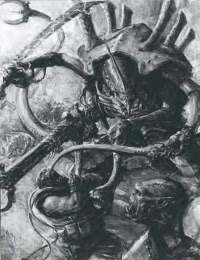
Now, the chugging engines of new Ork vehicles becomes audible. A sea of greenskin troops roars its approval as the next Tyranid assault wave moves into the ruins. Fire blasts to and fro as the assault organisms are led to battle by their Hive Tyrant.
The Mission
This mission was rolled straight out of the rulebook, with the mission turning up as The Scouring, and Vanguard Strike deployment.
Army Lists
HQ
Hive Tyrant: WARLORD, Wings, 2x Twin Devourers; Paroxysm, Psychic Scream; Old Adversary, Hive Commander
ELITES
Zoanthropes Brood: 3 strong, standard powers
Hive Guard Brood: 3 strong
Hive Guard Brood: 3 strong
TROOPS
Tervigon: Cluster Spines, Adrenal Glands, Toxin Sacs; Catalyst, Dominion
Termagant Brood: 12 strong
Hormagaunt Brood: 20 strong
Hormagaunt Brood: 20 strong
FAST ATTACK
Gargoyle Brood: 20 strong
Gargoyle Brood: 20 strong
Ravener Brood: 5 strong, Scything Talons and Rending Claws
HEAVY SUPPORT
Mawloc
Biovore Brood: 3 strong
FORTIFICATION
Aegis Defense Line: Quad Gun
HQ
Mek Boy: WARLORD, Shokk Attack Gun, Ammo Runt
Weirdboy: Warphead
ELITES
Lootas: 15 strong
TROOPS
Boyz Squad: 30 strong; Shootas, 3 Big Shootas, Nob with Power Klaw and Bosspole
Boyz Squad: 20 strong; Shootas, Nob with Power Klaw and Bosspole
Boyz Squad: 20 strong; Shootas, Nob with Power Klaw and Bosspole
Gretchin Squad: 10 strong, Runtherd
FAST ATTACK
Dakkajet: all da gubbinz (I don’t have up to date rules for him. 3 Twin Supa Shootas and BS3 vs. all targets)
Deff Koptaz: 2 strong, Twin Rokkit Launchas
Deff Koptaz: 2 strong, Twin Rokkit Launchas
HEAVY SUPPORT
Killa Kanz: 2 strong, Grot-zookas
Battlewagon: Deth Rolla, Red Paint Job, Armor Plates, Grot Riggers, 2x Big Shoota
Battlewagon: Deth Rolla, Red Paint Job, Armor Plates, Grot Riggers, 2x Big Shoota
Pre-game

The objectives for this mission went down first. While we didn’t know what the points value for each objective was when we placed it, I will record each value here. The first objective (1, Scatterfield) went in the crater barely visible on the right. The second objective (3, Nothing of Note) went in the ruins with the tank traps. The third objective (3, Scatterfield) was in the building nearest to the gray bastion. The fourth objective (4, Sabotaged!) was on the right edge of the central ruins, with the fifth objective (2, Nothing of Note) on the opposite side. The final objective (2, Sabotaged!) was between the red building and the extended crater.
The Orks rolled Princeps of Deceit for their Warlord Trait. My Trait gave the Orks -1 to their Reserve rolls.
The Orks won the roll to choose their deployment zone, setting their Aegis up along the center. Next came the roll for first turn, also picked up by the Orks.


The Orks spread out down their own line, filling in the space behind the Aegis with the big Boyz mob and the Killa Kanz. The twenty strong mobz went in the Wagons, while the Lootas went in the rear building. The Big Mek accompanied the Gretchin in the white bastion, and the Weirdboy joined the thirty strong mob on the ground. The Deffkoptaz took up support positions, ready to leap forward.


I went with a very conservative deployment with my Tyranids, afraid the amount of shooting his army brought would cripple me before I could move. The plan was to use my numbers and cover saves to keep the objectives secure while I moved out onto the table.
Using the Hive Commander ability, I left one Hormagaunt brood in Outflank Reserve. The Zoanthropes went into Reserves as well, while the Raveners planned to deploy by Deep Strike. The Mawloc and Hive Tyrant went behind the Bastion, while the Biovores deployed inside. The Gargoyles and one Hormagaunt brood filled up the space to the front of my army, with the Hive Guard in support on each flank. The Termagants filled the building, and the Tervigon grabbed all the cover it could manage nearby.
The Deffkoptaz leapt out with their Scout moves. One squad moved into the ruins on my extreme left flank, and the other shot into the central building. The Princeps of Deceit move was used to take the black Battlewagon further away from my army.
I attempted to Seize the Initiative and failed; the Orks would have the first turn.
Turn One
The Orks made very little advances, waiting to see where my Reserves would turn up. The first turn was Night Fight, so their few shots were more for noise than anything. A very few Gaunts and Gargoyles were shot down.
The Mawloc burrowed on my turn, ready to strike an unsuspecting Ork mob. I agonized forever on what to do with my Hive Tyrant. I made a critical error here and left him out of range to be the target of Catalyst. I finally decided I couldn’t adequately hide him from the Ork Dakkajet, so I flew up the far right flank in an attempt to close with the corner of his army. The Tervigon spawned babies, and the original Termagants moved up to fire on the encroaching Deffkoptas.

Tyranid shooting saw one felled Deffkopta, which led to the other squad member falling back. The Biovores killed nine Boyz behind the Aegis, but their numbers were still far too high to be affected. The smaller organisms continued their advance by running deeper into the midfield.
Objectives Controlled: Tyranids 3, Orks 1
Additional Tyranid Points: None
Additional Ork Points: None
Turn One Score: 7-2 Tyranids
Turn Two
The Ork Dakkajet flew on from reserves, making a direct line for the Winged Tyrant. The Orks continued to shuffle around their deployment zone, still waiting to respond to Tyranid reserves.
More Gaunts and Gargoyles joined the casualty table, but still in small numbers thanks to the abundant cover saves provided by Scatterfields. The Orks called their Waaagh!, and the Dakkajet fired his eighteen shots into the Tyrant. Through fortunate rolls on his part, he put eleven wounds on the Tyrant, and he disintegrated under the hail of fire.
At this point I was concerned that my Reserves would be slow in coming, since I had lost the benefits of Hive Commander. Fortunately, I passed all three Reserve rolls and all my units arrived. The Hormagaunts moved into position behind the red building, hoping to assault the Lootas. The Raveners landed by Deep Strike in the bottom of the red building, and the Zoanthropes floated on from my table edge to strike at the black Battlewagon. The Mawloc came up from the ground near the Ork bastion, killing on Grot inside with a Glancing Hit against the Bastion. His attack failed to damage either Battlewagon.
The Tervigon launched another squad of spawned Termagants into the fray, and still did not roll doubles. These Gaunts took up position on the nearby objective, and those spawned last turn advanced with the others.

In the shooting phase, the Biovores continued to rain fire on the large Boyz mob, killing several more. Still, they were too high in number to need a Pinning test. The Gargoyles all made Snap Shots against the Ork Flyer, removing one Hull Point. The nearest squad of Hive Guard also fired on the Flyer, missing completely.
The Zoanthropes charged their Warp Lances and fired on the black Battlewagon, tearing it apart with a blinding blast of psychic pyrotechnics. Ten of the twenty Boyz inside died in the explosion, and the survivors spread out in the crater. Finally, the second Hive Guard managed to put a wound on the two Deffkoptaz on the left flank.
Objectives Controlled: Tyranids 4, Orks 1
Additional Tyranid Points: Linebreaker
Additional Ork Points: First Blood, Slay the Warlord, Linebreaker
Turn Two Score: 10-5 Tyranids
Turn Three
The Orks quickly sprang into action to deal with the threat in their backfield. The surviving Battlewagon moved back towards the newly arrived Hormagaunts, dropping its boyz mob near their position. The Weirdboy rolled a Headbang, prompting a reroll for his Warphead rule. His second roll was “‘Ere We Go!”, leading them to Deep Strike near the base of the red building. The Killa Kanz moved through the tall ruin to their flank in an attempt to engage the Gargoyles on that objective. The survivors from the exploded Wagon moved into the central ruins to engage the Gaunts on the objective their.
The Ork shooting phase was characteristically brutal. Half of the newly arrived Hormagaunts died beneath the Shootas directed at them, and a single wounded Ravener walked out of the Lootas’ fire. The Weirdboy’s squad combined with the remnants from the Battlewagon to whittle down the lead Termagant squad before the charge began. The Dekkkoptaz and Dakkajet combined to kill off two of the Zoanthropes.
The Hormagaunts and the Ravener broke at the end of the Shooting Phase, fleeing toward their board edge. The Battlewagon Boyz launched an assault against the Hormagaunts, who surprisingly passed their test to regroup. They managed to kill one or two boyz before being wiped out in the melee. The survivors from the other Battlewagon suffered one casualty before slaughtering their way through the lead Termagant squad, camping themselves on top of the objective.
The Tyranids had taken serious damage to their lead elements, but I was struggling to keep the Orks squads choking on smaller Tyranid organisms, drowning them in a war of attrition while I still had the advantage in objectives. The Mawloc moved to assault the second Battlewagon, hoping to end the Orks’ mobility advantage. The Hormagaunts in my deployment zone moved to wipe out the Orks now occupying the central ruins, supported by two birthed squads of Gaunts. The Tervigon birthed a third squad of Gaunts, and still did not roll doubles! These moved to engage the Orks as well.
My shooting phase saw the lone Deffkopta slain, and two more Orks died in the central ruin as the Hive Guard opened fire. The Biovores dropped their spores on the Weirdboy’s squad, as they were all still in base contact from Deep Strike. These attacks annihilated the Ork Boyz in sprays of chitin shrapnel and bio-acid. When the explosions ended, the Weirdboy and a wounded Nob were all that remained. The Hive Guard on the right flank wrecked the Killa Kan nearest to the Gargoyles.
In the assault phase, I declared a charge against the Boyz in the central ruins with the squad furthest away. He elected to wait and see if I could make the long charge, hoping to use his Overwatch fire against something closer. These Termagants rolled an incredibly long charge, even through terrain, and locked the Boyz down. They were joined a moment later by a second squad of Termagants and the Hormagaunt brood. Seven Termagants were slain before the Orks were wiped out in a sea of stabbing arms. The Mawloc punctured the Battlewagon’s fuel tanks, sending the vehicle up in a massive fireball.
Objectives Controlled: Tyranids 4, Orks 1
Additional Tyranid Points: Linebreaker
Additional Ork Points: First Blood, Slay the Warlord, Linebreaker
Turn Three Score: 10-5 Tyranids
Turn Four
The Ork squad returned through the wreck of their Battlewagon to attack the Mawloc. The Weirdboy and the wounded Nob started moving towards the four point objective, just out in No Man’s Land. The surviving Killa Kan started moving back toward the center of the table, planning to support a purge of the central ruin. Now infested with dozens of Tyranids, it wasn’t going to be easy. Da Red Baron flew his Dakkajet off the table, ready to return next turn on a new attack vector.
The Tervigon had moved into the open to provide her bonuses for the assault; the Lootas now capitalized on a clear view of her, punching four wounds out in a storm of fire. The Shokk Attack Mek fired on some of the Gaunts, causing a handful of casualties.
The Orks launched an assault against the Mawloc. The burrowing creature tore one Ork Boy apart before taking four wounds in return. Being Fearless, he held in the close combat.
The Tervigon started the turn with a very small spawning of six Termagants. However, it STILL did not run out of spawning material! Casting Catalyst on itself, it retreated to cover once more. The Tervigon was the only Synapse Creature I still had, and it was down to two wounds. I was perilously close to losing my entire Synapse network.
The small squad of Gaunts spawned this turn quickly moved forward and took the four point objective, hunkering down in cover just outside Synapse range. The other squads maneuvered to make their holdings as secure as possible, bracing for the still-considerable Ork firepower.
The Hive Guard finally finished the Deffkoptaz with their Impaler Cannons; the second squad slew the Weirdboy and his Nob minder. This left combat to be resolved on turn four.
The Mawloc tore another Ork apart with a flurry of scything talon attacks. However, a moment later the Ork Nob tore him apart with his Power Klaw. The Orks consolidated toward the central ruin, desperate to break Tyranid control in this vital building.
Objectives Controlled: Tyranids 5, Orks 1
Additional Tyranid Points: None
Additional Ork Points: First Blood, Slay the Warlord
Turn Four Score: 13-4 Tyranids
Turn Five
The Battlewagon Boyz advanced on the central ruin, still needing an incredibly long charge to make the distance. The Dakkajet also returned to the table, drawing down on the Tervigon. With this little bit of movement, the Orks turned to their firepower.
The Dakkajet fired on the Tervigon, scoring an impressive eight hits. His luck ran out here, through, as he scored no wounds at all. The Shokk Attack Mek fired his weapon into the ruins, joined by firepower from the Lootas, the Battlewagon Boyz and the Slugga from the Nob. Since the squads were out of Synapse at this point, I went to ground against the attacks for a better cover save. Unfortunately it made little difference, and every squad suffered enough casualties to require a Morale check. All squads fell back, leaving the ruins uncontested.
The Tervigon spawned another brood of fifteen Gaunts. As in previous turns, it still did not roll doubles. These Gaunts filled up the space the Dakkajet could use to line up another shot on the Tervigon, preventing another attempt by the Dakkajet if the game went to turn six. The Tervigon then cast Dominion, sweeping up the retreating Gaunts in the Synapse web and driving them back to the objectives. The Biovores abandoned their bastion, moving to take shots against the last intact mob of Shoota Boyz.
The fire from the Biovores was devastating. The Orks had been moving full speed toward the objective and were very tightly packed. The first spore scored a hit and caught eleven Boyz in the blast. The next two spores were also directly on target, giving me thirty three hits. The only survivor was the Nob, with a single wound remaining.
At this point the Orks conceded the game. Their casualties had become too great to reclaim the central ruin.
Objectives Controlled: Tyranids 5, Orks 1
Additional Tyranid Points: Linebreaker
Additional Ork Points: First Blood, Slay the Warlord
Turn Three Score: 14-4, Tyranid Victory
Post-Game Thoughts:
I learned a lot about the Tyranids from this game. In the old days the tooth and claw approach worked very well. Now it seems the general level of firepower and the rules changes of 6th edition have made this Tyranid approach impractical. None of my units were survivable enough to weather the firepower each turn when it wasn’t being diminished. A few unlucky rolls would have seen victory snatched away in this game.
In future games I will be trying more fire support organisms. The Biovores were amazing, and I’d like to add more punishment from range. I think this will allow me to close the range with my assault units and have a good chance to mop up damaged squads after braving their firepower. I really noticed this against Orks; forty Shoota shots on Overwatch were bad enough, but then the Orks were better than my generic Hormagaunts in close combat!
MVP for the game has to go to the Tervigon. It added nearly fifty models to my army, which really helped to keep the pressure pushed beyond the objectives. It was also my only Synapse remaining. When things started looking dark, it helped hold the survivors together, keeping the Orks from capitalizing on their damage.
Hive Fleet Nug is back in full swing; look for more battle reports in the future!
The battle had raged back and forth for several days now. The sky was choked with Tyranid spores and the pollution of a thousand Ork vehicles. The human settlement was a complete wreck now, and the signs of both xenos life forms were everywhere.
Now, the chugging engines of new Ork vehicles becomes audible. A sea of greenskin troops roars its approval as the next Tyranid assault wave moves into the ruins. Fire blasts to and fro as the assault organisms are led to battle by their Hive Tyrant.
The Hordes Advance
The Mission
This mission was rolled straight out of the rulebook, with the mission turning up as The Scouring, and Vanguard Strike deployment.
Army Lists
Hive Fleet Nug - Assault Swarm
Tyranids - 2,000
(I forgot to take army shots for this game. Keep in mind there are still a LOT of Tyranid proxies. Where they feature in pictures, I will try to make note of what they represented.)
HQ
Hive Tyrant: WARLORD, Wings, 2x Twin Devourers; Paroxysm, Psychic Scream; Old Adversary, Hive Commander
ELITES
Zoanthropes Brood: 3 strong, standard powers
Hive Guard Brood: 3 strong
Hive Guard Brood: 3 strong
TROOPS
Tervigon: Cluster Spines, Adrenal Glands, Toxin Sacs; Catalyst, Dominion
Termagant Brood: 12 strong
Hormagaunt Brood: 20 strong
Hormagaunt Brood: 20 strong
FAST ATTACK
Gargoyle Brood: 20 strong
Gargoyle Brood: 20 strong
Ravener Brood: 5 strong, Scything Talons and Rending Claws
HEAVY SUPPORT
Mawloc
Biovore Brood: 3 strong
Da Bad Moonz Dakka Comp’ny
Orks - 2,000
FORTIFICATION
Aegis Defense Line: Quad Gun
HQ
Mek Boy: WARLORD, Shokk Attack Gun, Ammo Runt
Weirdboy: Warphead
ELITES
Lootas: 15 strong
TROOPS
Boyz Squad: 30 strong; Shootas, 3 Big Shootas, Nob with Power Klaw and Bosspole
Boyz Squad: 20 strong; Shootas, Nob with Power Klaw and Bosspole
Boyz Squad: 20 strong; Shootas, Nob with Power Klaw and Bosspole
Gretchin Squad: 10 strong, Runtherd
FAST ATTACK
Dakkajet: all da gubbinz (I don’t have up to date rules for him. 3 Twin Supa Shootas and BS3 vs. all targets)
Deff Koptaz: 2 strong, Twin Rokkit Launchas
Deff Koptaz: 2 strong, Twin Rokkit Launchas
HEAVY SUPPORT
Killa Kanz: 2 strong, Grot-zookas
Battlewagon: Deth Rolla, Red Paint Job, Armor Plates, Grot Riggers, 2x Big Shoota
Battlewagon: Deth Rolla, Red Paint Job, Armor Plates, Grot Riggers, 2x Big Shoota
Pre-game

The objectives for this mission went down first. While we didn’t know what the points value for each objective was when we placed it, I will record each value here. The first objective (1, Scatterfield) went in the crater barely visible on the right. The second objective (3, Nothing of Note) went in the ruins with the tank traps. The third objective (3, Scatterfield) was in the building nearest to the gray bastion. The fourth objective (4, Sabotaged!) was on the right edge of the central ruins, with the fifth objective (2, Nothing of Note) on the opposite side. The final objective (2, Sabotaged!) was between the red building and the extended crater.
The Orks rolled Princeps of Deceit for their Warlord Trait. My Trait gave the Orks -1 to their Reserve rolls.
The Orks won the roll to choose their deployment zone, setting their Aegis up along the center. Next came the roll for first turn, also picked up by the Orks.


Tyranid Deployment; the Bloodletters are stand-ins for Gargoyles, and the Chaos Terminators/Obliterators are Hive Guard.
I went with a very conservative deployment with my Tyranids, afraid the amount of shooting his army brought would cripple me before I could move. The plan was to use my numbers and cover saves to keep the objectives secure while I moved out onto the table.
Using the Hive Commander ability, I left one Hormagaunt brood in Outflank Reserve. The Zoanthropes went into Reserves as well, while the Raveners planned to deploy by Deep Strike. The Mawloc and Hive Tyrant went behind the Bastion, while the Biovores deployed inside. The Gargoyles and one Hormagaunt brood filled up the space to the front of my army, with the Hive Guard in support on each flank. The Termagants filled the building, and the Tervigon grabbed all the cover it could manage nearby.
The Deffkoptaz leapt out with their Scout moves. One squad moved into the ruins on my extreme left flank, and the other shot into the central building. The Princeps of Deceit move was used to take the black Battlewagon further away from my army.
I attempted to Seize the Initiative and failed; the Orks would have the first turn.
Turn One
The Orks made very little advances, waiting to see where my Reserves would turn up. The first turn was Night Fight, so their few shots were more for noise than anything. A very few Gaunts and Gargoyles were shot down.
The Mawloc burrowed on my turn, ready to strike an unsuspecting Ork mob. I agonized forever on what to do with my Hive Tyrant. I made a critical error here and left him out of range to be the target of Catalyst. I finally decided I couldn’t adequately hide him from the Ork Dakkajet, so I flew up the far right flank in an attempt to close with the corner of his army. The Tervigon spawned babies, and the original Termagants moved up to fire on the encroaching Deffkoptas.

Tyranids advance into Ork territory.
Tyranid shooting saw one felled Deffkopta, which led to the other squad member falling back. The Biovores killed nine Boyz behind the Aegis, but their numbers were still far too high to be affected. The smaller organisms continued their advance by running deeper into the midfield.
Objectives Controlled: Tyranids 3, Orks 1
Additional Tyranid Points: None
Additional Ork Points: None
Turn One Score: 7-2 Tyranids
Turn Two
The Ork Dakkajet flew on from reserves, making a direct line for the Winged Tyrant. The Orks continued to shuffle around their deployment zone, still waiting to respond to Tyranid reserves.
More Gaunts and Gargoyles joined the casualty table, but still in small numbers thanks to the abundant cover saves provided by Scatterfields. The Orks called their Waaagh!, and the Dakkajet fired his eighteen shots into the Tyrant. Through fortunate rolls on his part, he put eleven wounds on the Tyrant, and he disintegrated under the hail of fire.
At this point I was concerned that my Reserves would be slow in coming, since I had lost the benefits of Hive Commander. Fortunately, I passed all three Reserve rolls and all my units arrived. The Hormagaunts moved into position behind the red building, hoping to assault the Lootas. The Raveners landed by Deep Strike in the bottom of the red building, and the Zoanthropes floated on from my table edge to strike at the black Battlewagon. The Mawloc came up from the ground near the Ork bastion, killing on Grot inside with a Glancing Hit against the Bastion. His attack failed to damage either Battlewagon.
The Tervigon launched another squad of spawned Termagants into the fray, and still did not roll doubles. These Gaunts took up position on the nearby objective, and those spawned last turn advanced with the others.

In the shooting phase, the Biovores continued to rain fire on the large Boyz mob, killing several more. Still, they were too high in number to need a Pinning test. The Gargoyles all made Snap Shots against the Ork Flyer, removing one Hull Point. The nearest squad of Hive Guard also fired on the Flyer, missing completely.
The Zoanthropes charged their Warp Lances and fired on the black Battlewagon, tearing it apart with a blinding blast of psychic pyrotechnics. Ten of the twenty Boyz inside died in the explosion, and the survivors spread out in the crater. Finally, the second Hive Guard managed to put a wound on the two Deffkoptaz on the left flank.
Objectives Controlled: Tyranids 4, Orks 1
Additional Tyranid Points: Linebreaker
Additional Ork Points: First Blood, Slay the Warlord, Linebreaker
Turn Two Score: 10-5 Tyranids
Turn Three
The Orks quickly sprang into action to deal with the threat in their backfield. The surviving Battlewagon moved back towards the newly arrived Hormagaunts, dropping its boyz mob near their position. The Weirdboy rolled a Headbang, prompting a reroll for his Warphead rule. His second roll was “‘Ere We Go!”, leading them to Deep Strike near the base of the red building. The Killa Kanz moved through the tall ruin to their flank in an attempt to engage the Gargoyles on that objective. The survivors from the exploded Wagon moved into the central ruins to engage the Gaunts on the objective their.
The Ork shooting phase was characteristically brutal. Half of the newly arrived Hormagaunts died beneath the Shootas directed at them, and a single wounded Ravener walked out of the Lootas’ fire. The Weirdboy’s squad combined with the remnants from the Battlewagon to whittle down the lead Termagant squad before the charge began. The Dekkkoptaz and Dakkajet combined to kill off two of the Zoanthropes.
The Hormagaunts and the Ravener broke at the end of the Shooting Phase, fleeing toward their board edge. The Battlewagon Boyz launched an assault against the Hormagaunts, who surprisingly passed their test to regroup. They managed to kill one or two boyz before being wiped out in the melee. The survivors from the other Battlewagon suffered one casualty before slaughtering their way through the lead Termagant squad, camping themselves on top of the objective.
The Tyranids had taken serious damage to their lead elements, but I was struggling to keep the Orks squads choking on smaller Tyranid organisms, drowning them in a war of attrition while I still had the advantage in objectives. The Mawloc moved to assault the second Battlewagon, hoping to end the Orks’ mobility advantage. The Hormagaunts in my deployment zone moved to wipe out the Orks now occupying the central ruins, supported by two birthed squads of Gaunts. The Tervigon birthed a third squad of Gaunts, and still did not roll doubles! These moved to engage the Orks as well.
My shooting phase saw the lone Deffkopta slain, and two more Orks died in the central ruin as the Hive Guard opened fire. The Biovores dropped their spores on the Weirdboy’s squad, as they were all still in base contact from Deep Strike. These attacks annihilated the Ork Boyz in sprays of chitin shrapnel and bio-acid. When the explosions ended, the Weirdboy and a wounded Nob were all that remained. The Hive Guard on the right flank wrecked the Killa Kan nearest to the Gargoyles.
In the assault phase, I declared a charge against the Boyz in the central ruins with the squad furthest away. He elected to wait and see if I could make the long charge, hoping to use his Overwatch fire against something closer. These Termagants rolled an incredibly long charge, even through terrain, and locked the Boyz down. They were joined a moment later by a second squad of Termagants and the Hormagaunt brood. Seven Termagants were slain before the Orks were wiped out in a sea of stabbing arms. The Mawloc punctured the Battlewagon’s fuel tanks, sending the vehicle up in a massive fireball.
Objectives Controlled: Tyranids 4, Orks 1
Additional Tyranid Points: Linebreaker
Additional Ork Points: First Blood, Slay the Warlord, Linebreaker
Turn Three Score: 10-5 Tyranids
Turn Four
The Ork squad returned through the wreck of their Battlewagon to attack the Mawloc. The Weirdboy and the wounded Nob started moving towards the four point objective, just out in No Man’s Land. The surviving Killa Kan started moving back toward the center of the table, planning to support a purge of the central ruin. Now infested with dozens of Tyranids, it wasn’t going to be easy. Da Red Baron flew his Dakkajet off the table, ready to return next turn on a new attack vector.
The Tervigon had moved into the open to provide her bonuses for the assault; the Lootas now capitalized on a clear view of her, punching four wounds out in a storm of fire. The Shokk Attack Mek fired on some of the Gaunts, causing a handful of casualties.
The Orks launched an assault against the Mawloc. The burrowing creature tore one Ork Boy apart before taking four wounds in return. Being Fearless, he held in the close combat.
The Tervigon started the turn with a very small spawning of six Termagants. However, it STILL did not run out of spawning material! Casting Catalyst on itself, it retreated to cover once more. The Tervigon was the only Synapse Creature I still had, and it was down to two wounds. I was perilously close to losing my entire Synapse network.
The small squad of Gaunts spawned this turn quickly moved forward and took the four point objective, hunkering down in cover just outside Synapse range. The other squads maneuvered to make their holdings as secure as possible, bracing for the still-considerable Ork firepower.
The Hive Guard finally finished the Deffkoptaz with their Impaler Cannons; the second squad slew the Weirdboy and his Nob minder. This left combat to be resolved on turn four.
The Mawloc tore another Ork apart with a flurry of scything talon attacks. However, a moment later the Ork Nob tore him apart with his Power Klaw. The Orks consolidated toward the central ruin, desperate to break Tyranid control in this vital building.
Objectives Controlled: Tyranids 5, Orks 1
Additional Tyranid Points: None
Additional Ork Points: First Blood, Slay the Warlord
Turn Four Score: 13-4 Tyranids
Turn Five
The Battlewagon Boyz advanced on the central ruin, still needing an incredibly long charge to make the distance. The Dakkajet also returned to the table, drawing down on the Tervigon. With this little bit of movement, the Orks turned to their firepower.
The Dakkajet fired on the Tervigon, scoring an impressive eight hits. His luck ran out here, through, as he scored no wounds at all. The Shokk Attack Mek fired his weapon into the ruins, joined by firepower from the Lootas, the Battlewagon Boyz and the Slugga from the Nob. Since the squads were out of Synapse at this point, I went to ground against the attacks for a better cover save. Unfortunately it made little difference, and every squad suffered enough casualties to require a Morale check. All squads fell back, leaving the ruins uncontested.
The Tervigon spawned another brood of fifteen Gaunts. As in previous turns, it still did not roll doubles. These Gaunts filled up the space the Dakkajet could use to line up another shot on the Tervigon, preventing another attempt by the Dakkajet if the game went to turn six. The Tervigon then cast Dominion, sweeping up the retreating Gaunts in the Synapse web and driving them back to the objectives. The Biovores abandoned their bastion, moving to take shots against the last intact mob of Shoota Boyz.
The fire from the Biovores was devastating. The Orks had been moving full speed toward the objective and were very tightly packed. The first spore scored a hit and caught eleven Boyz in the blast. The next two spores were also directly on target, giving me thirty three hits. The only survivor was the Nob, with a single wound remaining.
At this point the Orks conceded the game. Their casualties had become too great to reclaim the central ruin.
Objectives Controlled: Tyranids 5, Orks 1
Additional Tyranid Points: Linebreaker
Additional Ork Points: First Blood, Slay the Warlord
Turn Three Score: 14-4, Tyranid Victory
Post-Game Thoughts:
I learned a lot about the Tyranids from this game. In the old days the tooth and claw approach worked very well. Now it seems the general level of firepower and the rules changes of 6th edition have made this Tyranid approach impractical. None of my units were survivable enough to weather the firepower each turn when it wasn’t being diminished. A few unlucky rolls would have seen victory snatched away in this game.
In future games I will be trying more fire support organisms. The Biovores were amazing, and I’d like to add more punishment from range. I think this will allow me to close the range with my assault units and have a good chance to mop up damaged squads after braving their firepower. I really noticed this against Orks; forty Shoota shots on Overwatch were bad enough, but then the Orks were better than my generic Hormagaunts in close combat!
MVP for the game has to go to the Tervigon. It added nearly fifty models to my army, which really helped to keep the pressure pushed beyond the objectives. It was also my only Synapse remaining. When things started looking dark, it helped hold the survivors together, keeping the Orks from capitalizing on their damage.
Hive Fleet Nug is back in full swing; look for more battle reports in the future!
Comments
Post a Comment