Battle Report – ATC Battle #1
While
my group is not planning to play in the American Team Championship this year, I
will be judging in the event and we decided to give the mission a few test runs
to work out any bugs. If you’re interested in trying out the mission, visit the
ATC website at www.whatc.org for full
details of the mission and how it is played.
Josh
brought his Space Marines and I pared my Tau Empire down to the 1850 point
total. We rolled randomly to determine which iteration of the mission we would
be using, and rolled up Game #4.
A well-executed
Kauyon attack had everything to do with timing and patience.
O’Mal’caor
studied the approaching forces carefully. He marked each target with a priority
in the targeting network as they closed the distance, giving greatest value to
a Gue’ron’sha transport marked with their command sigils.
To his left
stood an imposing edifice of concrete and ceramite. A stylized creature adorned
the flanks of the central tower, great wings rearing from its hideous form. He
supposed it was meant to intimidate any attackers. Now its form was cratered
and ruined by Tau ordnance, its defenders slain in their positions.
O’Mal’caor
watched the distances to the enemy APCs ticking down, confident that the
warriors of his Cadre were ready. With a quick neural command he activated the
ENGAGE sigil in his HUD, and the Pathfinders started marking targets.
ATC
Battle #1
The Mission
In
the ATC Mission, there are three primary objectives, each worth eight points.
There are also three secondary objectives, each worth two points. The total
possible score for each mission is 30.
The
first primary objective is Crusade, with an automatic four objectives. Each
player must place one objective in No Man’s Land, and the other objective can
be placed anywhere it could normally be placed. The second primary objective is
The Emperor’s Will. These may be placed anywhere they normally could be placed,
with the additional restriction that they may not be within 12” of a Crusade
objective. The final primary objective is Purge the Alien, and the three
secondary objectives are Slay the Warlord, First Blood, and Linebreaker.
In
addition, each of the missions modifies these base rules slightly. For our
mission, Fast Attack choices can Score, as they normally would in The Scouring.
In addition, when Fast Attack selections are destroyed they count as one extra
point when determining Purge the Alien.
The Armies
Relictors
4th Company
Space
Marines – 1,850
Chapter Tactics:
White Scars
HQ
Captain
Surat (Kor’sarro Khan): WARLORD
ELITES
Sternguard
Veteran Squad: four additional Veterans, Heavy Flamer, Rhino transport with
Dozer Blade
TROOPS
Tactical
Squad: five additional Space Marines, Plasma Gun, Sergeant has Combi-Plasma,
Rhino transport with Dozer Blade
Tactical
Squad: five additional Space Marines, Plasma Gun, Sergeant has Combi-Plasma,
Rhino transport with Dozer Blade
Tactical
Squad: Flamer, Razorback transport with Lascannon and Twin Plasma Guns
Tactical
Squad: Flamer, Razorback transport with Lascannon and Twin Plasma Guns
FAST
ATTACK
Stormtalon
Gunship: Twin Assault Cannons, Skyhammer Missile Launcher
Stormtalon
Gunship: Twin Assault Cannons, Skyhammer Missile Launcher
Land
Speeder Squadron: one additional Land Speeder, each has Heavy Bolter and
Typhoon Missile Launcher
HEAVY
SUPPORT
Centurion
Devastator Squad: Twin Lascannons, Missile Launchers, Sergeant has Omniscope
Stalker
Vior’la
Tok’rhenna Shi
Tau
Empire – 1,850
FORTIFICATION
Aegis
Defense Line: Quad Gun
HQ
Shas’O
Mal’caor Mont’yr (Commander): WARLORD; Multi-Spectrum Sensor Suite, Command
& Control Node, XV8-02 Crisis “Iridium” Battlesuit, Puretide Engram
Neurochip, Vectored Retro-Thrusters, Onager Gauntlet, Neuroweb System Jammer
Aun’ui
Tai’go (Ethereal)
ELITES
Shas’vre
O’res (XV104 Riptide): Ion Accelerator, Twin Fusion Blasters, Early Warning
Override, Velocity Tracker
TROOPS
Fire
Warrior Team: four additional Shas’las, Devilfish transport with Twin Smart
Missile Systems, Disruption Pods, and Sensor Spines
Fire
Warrior Team: four additional Shas’las, Devilfish transport with Twin Smart
Missile Systems, Disruption Pods, and Sensor Spines
Fire
Warrior Team: four additional Shas’las, Devilfish transport with Twin Smart
Missile Systems, Disruption Pods, and Sensor Spines
FAST
ATTACK
Piranhas:
two additional Piranhas, each has a Fusion Blaster
Pathfinder
Team: three additional Pathfinder Shas’las
Pathfinder
Team: three additional Pathfinder Shas’las
HEAVY
SUPPORT
XV88
Broadside Team: two additional Broadside Shas’uis, each XV88 has Twin
High-Yield Missile Pods, Twin Smart Missile Systems, and Target Locks, Team
accompanied by six Missile Drones
Sky
Ray Missile Defense Gunship: Disruption Pods, Sensor Spines, Blacksun Filter
Pre-game

With
the ATC Mission, each mission declares if there is Night Fighting or not. This
mission did not use Night Fight. My opponent’s Warlord Trait was automatically
generated by Kor’sarro Khan, whereas my own was Through Unity, Devastation.
The
first Crusade objective was directly behind the Fortress of Redemption’s tower
and on the ground; the second was in the ruins on the far side of the table, on
the second floor. A third was in the right corner of the nearest ruins, on the
side closest to the Fortress. The fourth and final Crusade objective went in
the ruins on the left.
Next
up we set out our Emperor’s Will objectives. Mine went behind the furthest
bunker of the Fortress of Redemption, while the Space Marines deployed theirs
in the bottom left corner of the ruins on the left side.

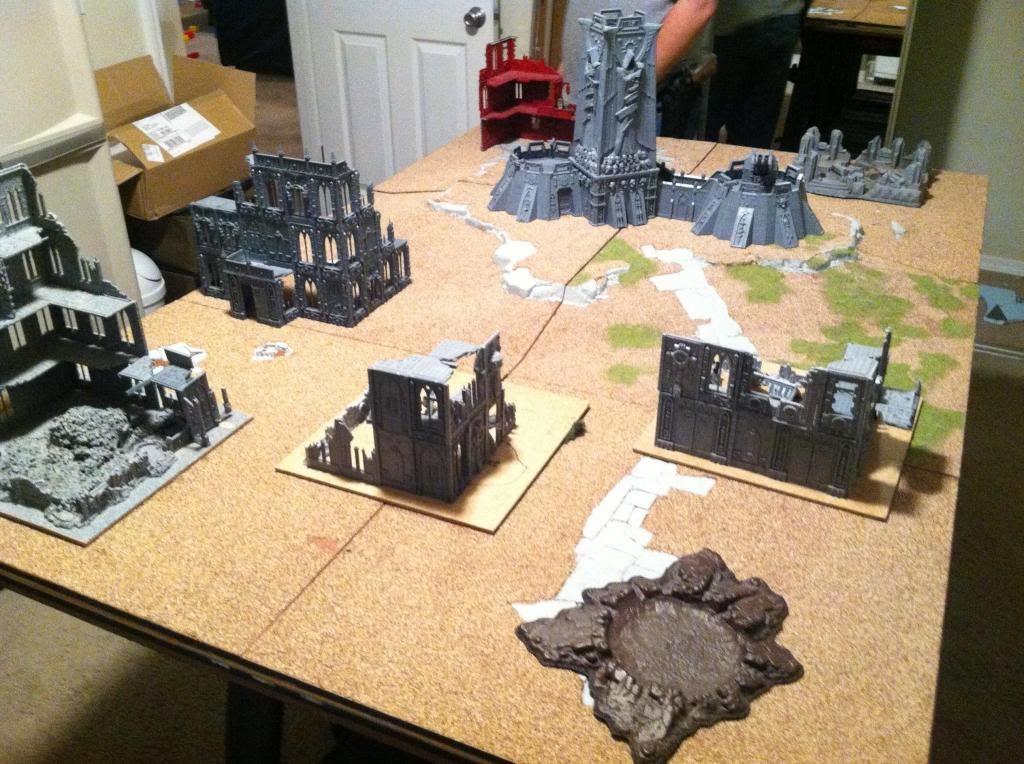
Space
Marines deployment (after Scout moves).
I
won the roll for table sides, and my opponent won the roll for first turn. The
Relictors deployed along their deployment edge with all of their transports,
with the Stalker deploying on their Emperor’s Will objective. The Land Speeder
went into a protected position behind the central ruin, with the Centurions
deploying inside with the final Razorback.

I
almost left my Aegis Line unmanned, since the Scout moves from Khan were going
to leave the Rhino squads right on top of me Turn One. Instead I decided to
deploy for a Patient Hunter attack, using the Commander and his Broadsides to
lure the Space Marines in. I then deployed the Devilfish and the Sky Ray behind
the Fortress, where they could quickly move in to cause casualties on the
Marines as they advanced. The Riptide and the Piranhas also deployed in the
rear, where they couldn’t receive damage early on.
Next
came Scout moves. While my Pathfinders eased forward into their designated
firing positions, the Space Marines leapt off the line aggressively, closing
the open kill zone at a dangerous pace. I would have one Shooting Phase to
fight back, and that was after all those Space Marines took their shots at my
Commander!

While
I was stressing out, my Commander kept his cool. I Seized the Initiative, and
the Tau leapt into action.
Turn One
The
Commander gave his squad Tank Hunters, and the Ethereal used Sense of Stone,
since most of my Pulse weaponry would be out of range. The Devilfish APCs moved
to gain better position for the coming turns, and then the fire elements
engaged the Space Marines.
The
Sky Ray hit with one Markerlight against the left Rhino, but failed to damage
with its Smart Missiles. The Pathfinder Teams then put two Markerlights on the
Sternguard Rhino, and four on the right Rhino. The Broadsides and their Drones
put fire on each of the four advance transports in turn.
The
Razorback exploded, failing to cause any casualties but Stunning the squad
inside. The left Rhino became a burning wreck, Shaking the squad in the process
and Pinning them as they emerged. The Sternguard Rhino burned as well, Shaking
Surat and his Veterans. Finally the right Rhino exploded, killing two of the
Sternguard and one of the Marines inside. The Riptide fired a shot at the
Centurions, but it drifted far off target.
The
mobile Tau elements leapt into positions of relative safety to await the Space
Marines’ response.

The
Space Marines are left immobile and stranded in the middle of No Man’s Land,
but they haven’t given up the war that easily.
The
squad on the Space Marines’ left flank attempted to move into the nearby
building but rolled two 1’s as they exited the crater. The rest of the Space
Marines maneuvered toward the Fortress of Redemption, using it as cover against
the bulk of the Tau forces. The Centurions took up better firing positions and
opened up on the visible Devilfish, tearing it apart in a storm of fire. Three
of the Shas’las inside were incinerated, and five of the nearby Pathfinders
died in the scything shrapnel!

The
Fire Warriors are gone, and the Pathfinders have taken terrible damage.
The
surviving Razorback fired a round at the Broadsides, but failed to wound. The
Pathfinders passed their Morale Check, but the Fire Warriors promptly fled the
table! As Turn One came to an end, both sides had taken significant damage to
their mobility, and one of my three scoring units was gone. With the objectives
split between our deployment zones, this had turned into a standoff that would
surely become bloody.

Crusade: Space Marines
0, Tau Empire 1
The Emperor’s
Will:
Space Marines 0, Tau Empire 0
Purge the Alien:
Space
Marines 2, Tau Empire 4
First Blood: Tau Empire
Slay the
Warlord:
Unclaimed
Linebreaker: Unclaimed
Turn One Score: Space Marines 0,
Tau Empire 18
Turn Two
With
the enemy’s mobility neutralized, the Tau Empire started working forward to
claim objectives. The Devilfish continued to move around on the left of the
Fortress, while the Riptide leapt up again to take his shots. The Gun Drones
from the Piranhas flew up onto the battlements of the Fortress, and the
Piranhas lined up their front armor in preparation for the Space Marine Flyers.
Using
Storm of Fire from the Ethereal, the Gun Drones cut down four Marines from the
Razorback squad. The Smart Missiles on the Devilfish finished the last man a
moment later. The Broadsides split their fire again in an attempt to clear the
last of the Space Marines’ armor. The Razorback exploded, killing two of its
charges in the process, and the Land Speeders went down in a hail of missiles.
The Gun Drones failed to destroy the Stalker, however, only managing to Shake
it and inflict a Glancing Hit.
The
Pathfinders marked the Centurions for the Riptide, increasing his Ballistic
Skill to 5 and giving his Ion Accelerator Ignores Cover. He lined up the shot
and fired, rolling three 1’s! He then dropped back into the cover of the
Fortress Tower, recalibrating his clearly damaged weapon.
Shas’vre O’res
grunted in frustration as his Ion Accelerator’s status symbol flashed yellow.
Bolter rounds sparked against his armor as he dropped back into cover behind
the tower.
“No charge,” he
responded as the Pathfinders queried his move. “The gun is momentarily down.”
The XV104’s
Early Warning Override chimed as a Flyer entered close proximity range. O’res
tasked the Fusion Blaster and pulled a perfect shot as it tore through the sky.
At the last instant, the pilot threw his vehicle into a stunning nose-dive, and
the energy beam tore harmlessly through the sky. O’res could feel anger
building in his chest, until the Commander’s level voice cut across the
network.
“Affect
repairs,” Mal’caor’s voice commanded. “I need you in this fight, O’res.”
The Commander’s
words hurt more than any wound the grizzled veteran could imagine. “It will be
done, Shas’o.”

The
Space Marines are still in the quagmire of wrecked armor at table’s center.
One
of the Stormtalons raced onto the table, thrusters burning as it bore down on
the Tau’s left flank. The Riptide unleashed an Interceptor shot with its Fusion
Blaster, but my opponent chose to Evade and successfully threw off the shot.
The
Space Marines advanced on their various objectives again, with the squad in the
center still bogged down in their crater. The Sternguard were able to reach the
edge of the Fortress, and they slowly started working their way around to the
far side.
The
Centurions scored a Penetrating Hit against the Sky Ray, again bypassing an
impressive Cover Save to Shake the vehicle, protecting the lone Stormtalon from
retribution. The Flyer made Snap Shots against the Ethereal’s Devilfish, but
was unable to cause any damage. The Stalker wounded the Quad Gun, and the Space
Marines braced for return fire.
Crusade: Space Marines 1,
Tau Empire 1
The Emperor’s
Will:
Space Marines 0, Tau Empire 0
Purge the Alien:
Space
Marines 2, Tau Empire 8
First Blood: Tau Empire
Slay the
Warlord:
Unclaimed
Linebreaker: Unclaimed
Turn Two Score: Space Marines 4,
Tau Empire 14
Turn Three
The
Sky Ray quickly moved toward the corner of the table, getting clear of the
impressive firepower from the Centurions. The Riptide stepped out to fire once
more, drawing down on the Space Marines again. The Piranhas rushed toward the
Space Marines Flyer, and the Devilfish repositioned to be protected from
incoming shots.
The
Pathfinders again targeted the Centurions and fed targeting data to the
Riptide, and this time he scored three hits. However, only one of these managed
to be converted to a wound, with two more 1’s! The Broadsides fired on the
Space Marine squad stuck in the center of the table, killing five of them. The
Snap Shots from the Shaken Sky Ray missed the Stormtalon, but the Piranhas
managed two hits anyway! However, Ceramite Plating saved the Flyer, as both
hits rolled a two to break through the armor.
The
second Stormtalon came onto the table, taking up position in ruins where the
Riptide’s Fusion Blaster couldn’t make a shot. The first Flyer moved up to
strafe the Sky Ray and put an end to its firepower.
The
Centurions fired on the Broadsides since it was the only target they had left,
with the Sergeant splitting away to fire at the gun. The Sergeant blew apart
the Quad Gun, and the other two warsuits managed to slay a Drone. Bolter fire
from the Marines in range put one wound on the Commander. The first Stormtalon
strafed the Sky Ray, scoring a Glancing and a Penetrating Hit. The Disruption
Pods finally kicked in, deflecting the Penetrating Hit and leaving the Sky Ray
with one Hull Point remaining. The second Stormtalon raked the Piranhas,
bursting two of them apart and riddling their pilots with high-caliber rounds.

Further
poor Movement rolls have left the Space Marines out of position, and their
casualties are really showing.
Crusade: Space Marines
1, Tau Empire 1
The Emperor’s
Will:
Space Marines 0, Tau Empire 0
Purge the Alien:
Space
Marines 2, Tau Empire 4
First Blood: Tau Empire
Slay the
Warlord:
Unclaimed
Linebreaker: Unclaimed
Turn Three
Score: Space
Marines 4, Tau Empire 14
O’res allowed a
smile to crease his face as the status indicator on his weapon turned bright
blue. The annoying yellow bar disappeared, and he fed power through the system
again.
“XV104 is back
online and available for tasking,” he said triumphantly. Within a moment, the
Pathfinders were feeding him images of Gue’ron’sha dashing toward the Fortress
Walls.
Their proximity
was unforgiveable. It was time to make restitution.
O’res leapt from
the fortress wall and feathered his thrusters. The Gue’ron’sha nearby attempted
to disperse as his thrusters engaged, but he lowered the weapon and fed the
Pathfinders’ targeting data into the processor. With a satisfying hum, the
white-hot energy round leapt from the barrel and slammed home amongst the Space
Marines, turning them to ash as his thermal visor bloomed to shield his eyes.
The Riptide’s
feet had just hit the ground when O’res reversed his stabilizers and leapt back
into cover of the tower.
Turn Four
At
this point I was running out of time to make the moves I needed to finish the game.
My opponent was closing on his Emperor’s Will objective, and the bulk of his
Troops were still intact.
The
second Fire Warrior Team debarked from their Devilfish in case they were needed
against the Flyer, joined a moment later by the Gun Drones from the Piranhas.
The Riptide leapt from the tower and took aim on the Tactical Squad at its
base. With this minimal movement completed, I started working to ease the
pressure from my position.
The
Sky Ray scored one two Markerlight hits against the furthest Stormtalon and
used them to Ignore Cover, firing all six Seeker Missiles and turning the Flyer
into a fireball. The Fire Warriors and the Drones fired on the second
Stormtalon but were unable to cause any damage. Finally, the Missile Drones
brought it down with a pair of Penetrating Hits. The Pathfinders marked the
Tactical Squad at the base of the tower, and the Riptide killed six of them
with his Ion Accelerator. The Broadsides finished off the retreating Tactical
Squad that was moving to hold the Emperor’s Will objective, and the last
Piranha moved to hold the Crusade objective nearby.
At
this point, my opponent felt the damage had finally been done, and he conceded
a great game.
Crusade: Space Marines
1, Tau Empire 2
The Emperor’s
Will:
Space Marines 0, Tau Empire 0
Purge the Alien:
Space
Marines 2, Tau Empire 13
First Blood: Tau Empire
Slay the
Warlord:
Unclaimed
Linebreaker: Unclaimed
Turn Four Score:
Space
Marines 0, Tau Empire 18
Space Marines
concede; Tau Empire victory.

The
Space Marines quit the field as their poor Movement distances finally make the
difference.
Post-game
Thoughts
Josh:
This
was quite the game. I love the ATC mission format. It creates a challenging
mission when you have to keep track of all those objectives. That said, I have
a few criticisms for this year’s mission. The first is the lack of Mysterious
Objectives. This rule is very random and can help or harm all parties at any
time, but that is half the fun of using it. Without it or Mysterious Terrain,
the board is very one dimensional. There is nothing about the objectives to
differentiate between them. It doesn’t make the mission boring in itself, but
it definitely doesn’t help bring any flavor to the game.
I
started out the pregame rolls by losing the choice of deployment zone, but the
Tau chose the corner that would give me some very critical LoS-blocking terrain
to divide the board in almost two perfect halves. This tempted me to try an end
around maneuver and completely ignore the Broadside “machine gun nest.” In
hindsight that could have worked very well, but I digress. I won the roll to go
first and the set the bulk of my army up on the very deployment edge to Scout
forward and close the gap as fast as possible. Once the Tau had set up, I made
my Scout moves as far forward as possible and waited for the Seize roll. It is
important for me to note, I called the result of this roll as soon as I made my
Scout moves. He rolled the six and stole the first turn from me!
My
opponent then used his first turn to de-mech my army. He knocked out three
Rhinos and a Razorback, Stunned two squads, shook a third and they failed their
Pinning check. That was a bad first turn for me, but the White Scars Chapter
Tactic had saved my army. Being 12” farther forward at the beginning kept me
from being taken out of the game on Turn One. However, the infantry never got
their crap together, my rolls to move and shoot never got on. I moved one squad
every turn for four turns and went a grand total of 6”! My Centurions did well
for themselves this game, and my opponent’s Broadside Team did as well.
Everyone else seemed to be playing a game of slap fighting. I had nine Troops
models left in my army after the top of Turn Four, and had only one of my
support elements left, so I called it quits before my fourth turn. I still feel
the sting of the Tau Shooting Phase, but this White Scars approach brought me
closer to stopping the fish people than any other approach I have tried. Until
next time, you dirty Communists!
Randall:
The
ATC mission is always a nice change of pace, because it forces you to think
along multiple avenues of approach. Your battle plan has to remain flexible,
because your opponent can change the vector of pressure at any moment.
Those
Marines could not catch a break! Every time they moved, it was an inch or two,
and those clear of terrain were out of position to take advantage of their
Scout move. It was a bold gamble to send them into hell’s teeth so quickly, and
I can’t help but feel that the Seize roll cheated him out of a chance to make a
serious game of this.
My
biggest takeaway from this mission was the importance of terrain that
completely blocks Line of Sight, because it drastically changes the way certain
armies play. You can’t always count on having a Fortress of Redemption around,
but every table should strive to have something that completely breaks up Line
of Sight and routes of advance.
This
is my first time playing Tau below 2,000. I have a lot of thinking to do before
I complete my tournament list, but this game showed me several things I need to
change before taking Tau out competitively. Stay tuned for more games featuring
the ATC mission in the near future.
+Exorcists+Shoulder+Pad.jpg)

Comments
Post a Comment