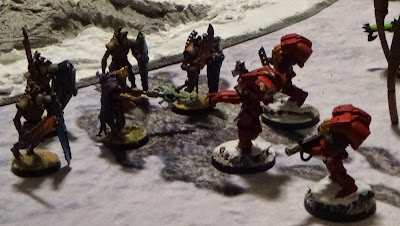
Warhammer 40,000 Battle Report # - Blood Angels vs Necrons
Visit our PRODUCT LISTING to get in on the gaming aids and components offered by Enter the Maelstrom!
Welcome
back to the Maelstrom! Today the Blood Angels and the Necrons debut to do
battle, with each army freshly painted and going to war on our newly completed
table.
Army Lists
Knights
of Baal – 4th Company
Blood
Angels – 2,000
HQ
Chaplain:
(WARLORD) Jump Pack, Melta Bombs
ELITES
Death
Company Squad: five additional Death Company Marines; Jump Packs, one has Thunder
Hammer and Boltgun
Furioso
Dreadnought: Frag Cannon, Power Fist with Heavy Flamer, Magna-Grapple, Drop Pod
with Deathwind Missile Launcher
TROOPS
Tactical
Squad: five additional Space Marines; Heavy Flamer, Flamer, Veteran Sergeant
has Combi-Flamer and Power Fist,
Rhino transport
Tactical
Squad: Plasma Gun, Razorback transport with Lascannon and Twin Plasma Guns
Tactical
Squad: Plasma Gun, Razorback transport with Lascannon and Twin Plasma Guns
FAST
ATTACK
Assault
Squad: five additional Space Marines; 2x Meltagun, Veteran Sergeant has Power
Fist
Assault
Squad: five additional Space Marines; 2x Meltagun, Veteran Sergeant has Power
Fist
HEAVY
SUPPORT
Baal
Predator: Twin Assault Cannons, Heavy Bolter Sponsons
Baal
Predator: Twin Assault Cannons, Heavy Bolter Sponsons
Vindicator:
Siege Shield, Overcharged Engines
Kintma
Dynasty
Necrons
– 2,000
HQ
Nemesor
Zahndrekh: (WARLORD) Eternal Madness
Illuminor
Szeras
ELITES
Lychguard:
Hyperphase Swords and Dispersion Shields
Triarch
Stalker: Heat Ray
Triarch
Stalker: Heat Ray
TROOPS
Immortals:
five additional Immortals
Immortals:
five additional Immortals
Necron
Warriors: six additional Warriors
Necron
Warriors: five additional Warriors
Necron
Warriors: five additional Warriors
HEAVY
SUPPORT
Monolith
Monolith
After Action
Review
I
cannot believe how badly dice went for both of us. From start to finish, we
were failing every save we were called on to make. Even with Reanimation, I
just couldn’t keep anyone in the fight. It showed in the casualties, when we
had lost an absolute ton of models by the end of turn three.
The
Blood Angels did a good job of forcing me into the corner. I did a refused
flank to keep the mountain from cutting my army in two over the course of the
game. I wonder if I might have been better off to deploy half the force to
either side instead, and then use the Monoliths to reposition where I was
needed. Still, I was afraid of what that Vindicator would do to my big vehicles
over the course of the game.
The
Stalkers were fantastic for buffing my surrounding infantry, but I have to get
better at moving in blocks. I lost most of that synergy late in the game,
simply by moving my Stalkers to the wrong places.
If
I had my share of bad luck along the way, though, Josh was in absolutely
miserable territory. As I went back and watched the videos I realized how many
of his models were dying in his turn!
He took so much incidental damage and failed so many charges, it just left him
standing in the open to be shot to pieces.
In
the end I was able to shut down the murderous fire of the Baal Predators to
claim the second objective. When his Death Company took too many casualties to
push through my Immortals, I knew that was the end of his advance. His
casualties just piled up too fast, and even though we were both suffering from
poor dice, he simply took too much damage.
Let us have it, armchair generals; what should we have done
different to see this game to a different conclusion? Let us know in the
comments below!
Visit our PRODUCT LISTING to get in on the gaming aids and components offered by Enter the
Maelstrom!

+Exorcists+Shoulder+Pad.jpg)
Comments
Post a Comment